PDFVersion
No ads? No problem! Download the PDF book of this tutorial for just $24.99. Your support will help us reach more readers.
Thank You!
C++ Environment Setup
In this tutorial, let's kick off our journey into basic C++ programming. However, before we dive in, we'll need a text editor for tweaking our C++ code, and a compiler to transform our source code into the final executable program. Now, there's a plethora of good and not-so-good editors and compilers out there, but we're after something fundamental, a place where we can edit and compile our code.
For learning purposes, I'd recommend going with the Dev-C++program, especially if you're on Windows. Dev-C++ is a comprehensive integrated development environment (IDE) for C and C++ on the Windows platform. The best part? It's free and user-friendly. If you're keen on using Dev-C++ for learning C++ programming, follow my steps to get the application up and running on your system.
Head to the official website at bloodshed.net, and grab a free copy of Dev-C++.
Once the download is complete, right-click on the downloaded file and choose "Run as Administrator" to kick off the installation. You might encounter a "User Account Control" prompt - just click "Yes" to get the installation rolling.
- If you've got an older version of Dev-C++ hanging around on your computer, be sure to uninstall it first via the control panel. Then, click "OK" on the open dialog box.
- Select a language, and hit OK.
- License Agreement - You're pretty much stuck agreeing with whatever's written there. If you've got time to spare, go ahead, read through all the agreements, and then hit "I agree."
- Choose Components - On the next screen, you can pick the features of Dev-C++ to install. I'd recommend going with the default selection and hitting next.
- Choose Install Location - On the next screen, choose the installation folder. The default selection is fine. After choosing, hit Install.
- Your program will start installing, and it won't take much time. Once done, another window will pop up - click finish.
After a successful installation, a "first-time configuration" window will appear. Choose your language and Dev-C++ environment theme. Once that's sorted, press next.
- Opt for the "Yes, I want to use this feature" option and press next.
- Choose "Yes, create the cache now" and press next.
- Press OK to proceed with loading.

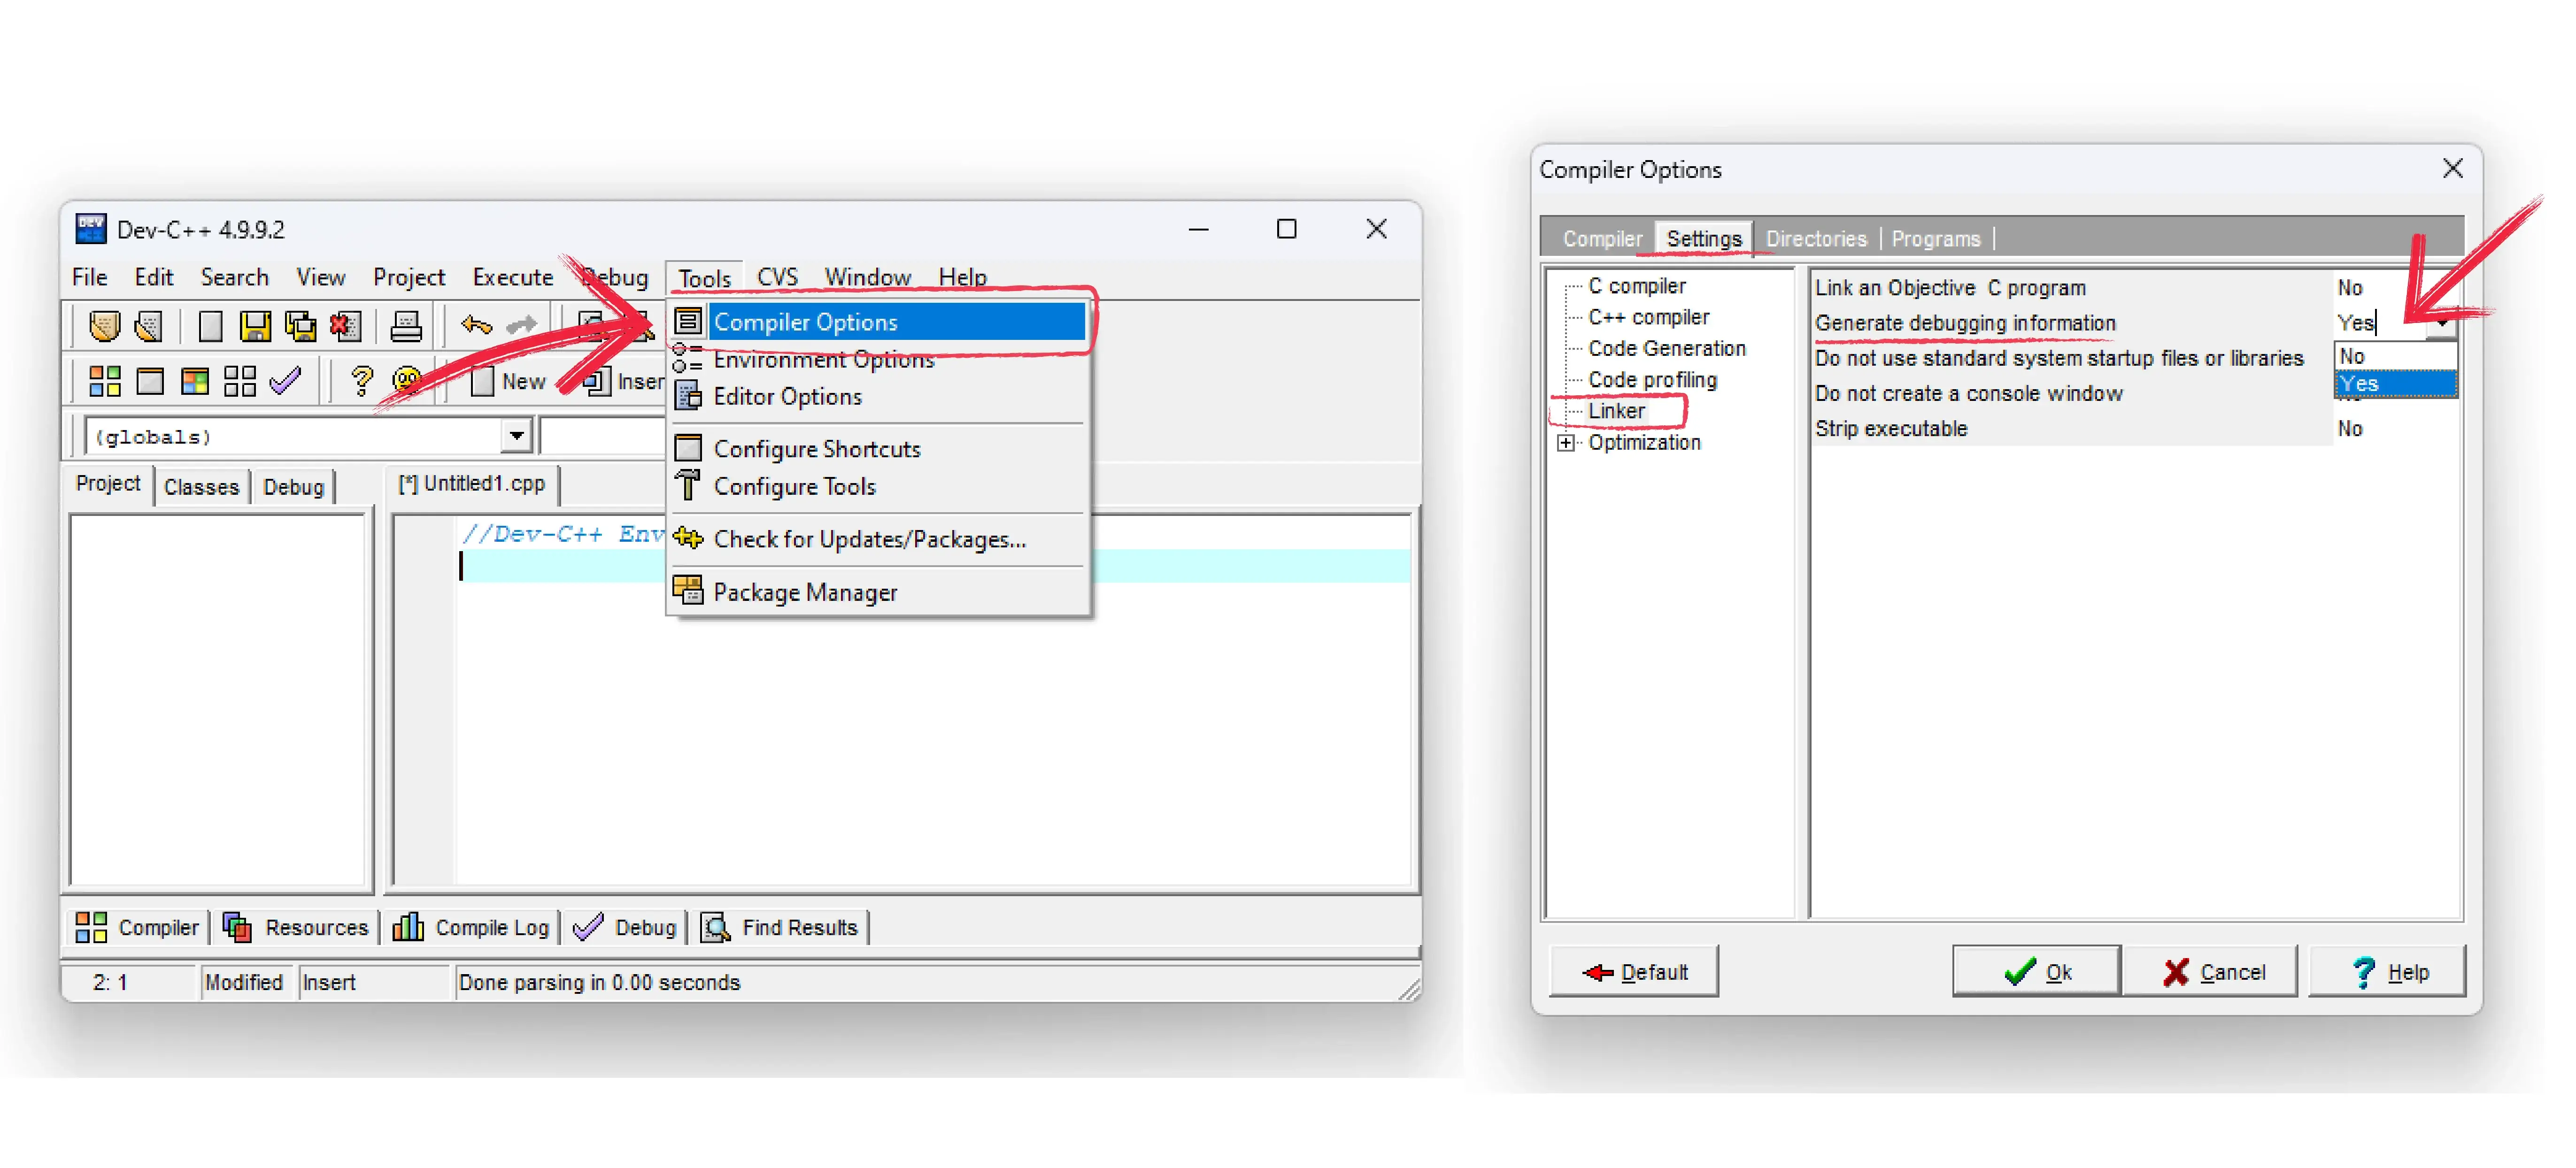
Now, we need to tweak one of the default settings to enable the debugger for our program. Follow these steps:
- Go to the "Tools" menu and select "Compiler Options."
- In the "Settings" tab, click on "Linker" on the left panel.
- Change "Generate debugging information" to "Yes."
- Click "OK" to apply the settings.

Sardar Omar
I did my hardest to present you with all of the information you need on this subject in a simple and understandable manner. However, if you have any difficulties understanding this concept or have any questions, please do not hesitate to ask. I'll try my best to meet your requirements.
